Tutorial Goodbye
Tube Woman by PSPcyber
Tube Paisagem by Patou
Mask by Brujita
Corda X e Wordart recebido em grupo de materiais
Outras versões do meu tutorial
Material

Plugin usado: CPK Designs - Screening
Alien Skin xenofex 2 - Bling Bling
Efeitos do PSP
|
Use a seta para fazer o
tutorial.

|
Roteiro:
1. Abra uma imagem
transparente de 800x600 px.
Escolha duas cores do seu tube, e configure na paleta de
materiais:
Eu usei: foreground: #636d4a e background: #2c3420.
Forme um gradiente nas configurações: Style Linear
- Angle 270 - Repeats 0 - invert selecionado
Pinte a layer.
Layers - new raster layer
Pinte a layer com o gradiente anterior, desta vez com o
invert não selecionado.
2.
Layers - Load/save mask - from disk
Procure a mask " " e aplique.
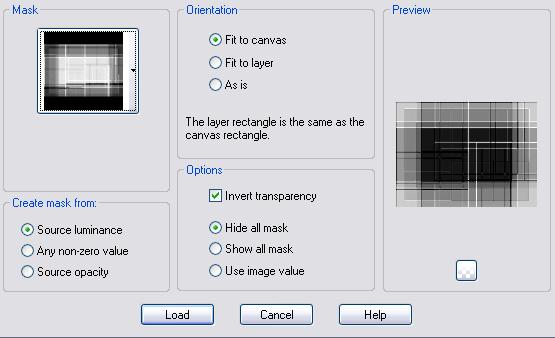
Layers - Merge - Merge Group.
Effects - 3D effects - Drop shadow 1 1 25 3,0 #000000.
3. Layer
- new raster layer
Com a ferramenta selection trace um quadrado na esquerda
e pinte com o gradiente da etapa 1 - inverte não
selecionado.
Selection - Modify - Contract 3
Invert - Float - pinte com a cor #25291b.
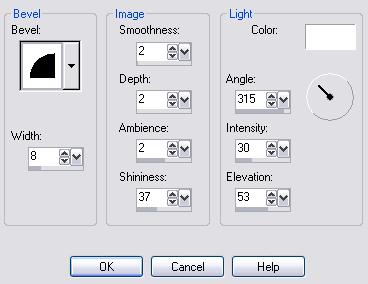
Effects - 3D Effects - Inner Bevel
Selection none.
4. Layer
- new raster layer
Com a ferramenta selection trace outro quadrado na
direita e pinte com o gradiente da etapa 1 - inverte
selecionado.
Selection - Modify - Contract 3
Invert - Float - pinte com a cor #25291b.
Effects - 3D Effects - Inner Bevel como na etapa 3.
Selection none.
Feche a 1ª e 2ª layer e com as 2 layers dos quadrados
faça
Layers - Merge - Merge Visible.
5. Abra
o tube "batiment-13-par-patou"
e copie
Selecione os quadrados com a ferramenta selection
Past into selection.
Mude o blend mode para Luminance (L)
6. Abra o tube "decor18"
Paste as new layer
Image - Resize 60%
Posicione ao centro (veja tag final).
Adjust - Hue and Saturation - Colorize 54 / 34
Effects - 3D Effects - Drop Shadow 1 1 50 5 #000000.
7.
Abra o tube "tubespspcyber-faces-40-005"
Copy - Past New Layer
Effects - 3D effects - Drop Shadow 1 1 75 5,0
#000000.
8.
Abra o tube "wordartgb"
Copy - past new layer
Coloque acima na direita (veja a tag final).
Effects - 3D Effects - Drop Shadow 1 1 35 5,0
#dde6c8
9.
Layers - Merge all
Selection - selection all - modify - contract 40
Selection - Invert
Pinte com a cor #25291b.
Selection - selection all - modify - contract
30
Effects - Plugin CPK Designs - Screening
Selection - selection all - modify - Contract 10
Pinte com a cor #25291b.
Selection none.
10. Assine seu
trabalho.
Layers - Duplicate 2x, ficará com layers.
Freehand selection - selecione a área dos quadrados,
sem encostar na mulher e no wordart.
Feche a primeira a 2ª e a 3ª layer.
Na primeira layer faça: Effects - Plugin Alien Skin
Xenofex 2 - Bling Bling
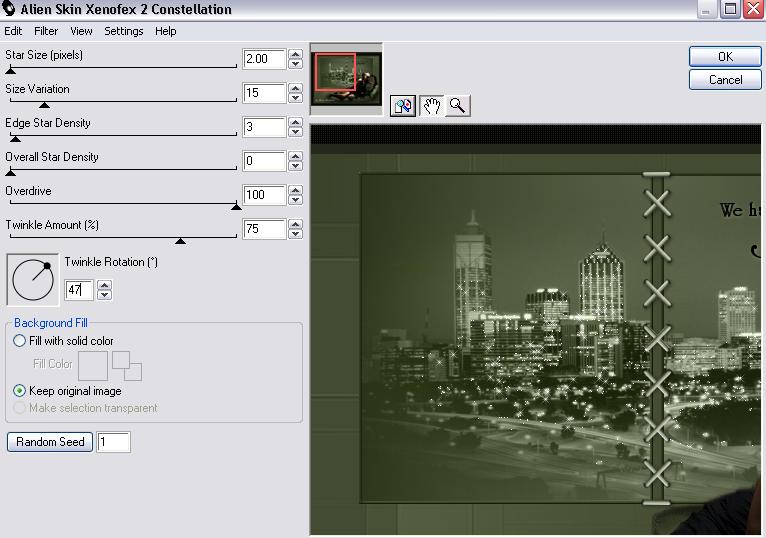
Feche a 1ª layer e
abra a segunda mudando o Random Seed
Feche a 2ª layer e abra a terceira mudando o Random
Seed
Selection none.
Salve uma por uma em psp animation shop.
11. Abra o programa
Animation Shop
Animation Wizard - busque os 3 arquivos salvos
Velocidade: 25
12. Salve e está pronto!!!
Meus tutoriais são registrados by
TWI

Home
Design by
Sweet Seduction.
Copyright © 2009 -
2010 by Sweet Seduction.

