Tutorial Sieze the Moment
Tube Woman by Paulina
Tube Paisagem by Tinnad
Mask by Brujita
Wordart e Element - recebido em grupo de materiais
Outras versões do meu tutorial
Material

Plugin usado: Filters Unlimited 2.0 - Sandflower Specials -
Pool Shadow
Alien Skin Xenofex - Constelation - Bling Bling
Efeitos do PSP
|
Use a seta para fazer o
tutorial.

|
Roteiro:
1. Abra uma imagem
transparente de 800x600 px.
Configure na paleta de materiais - foreground: #ba8ab4
Pinte a layer.
Layers - New raster layer
Configure na paleta de materiais - foreground: #381031
Pinte a layer.
2. Layers - Load/Save
Mask - Load Mask from disk
Procure a mask "Brujita_mask0021"
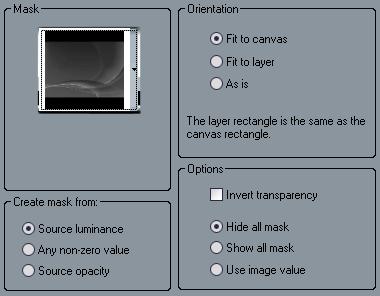
Effects - Edge Effects
- Enhance more
Na paleta das layers clique em Delete Layer
Clique em ok.
Layers - Merge - Merge group.
3. Layers - New raster
layer
Selection all
Abra o tube paisagem "BEACHES TINNAD (2)" e copie
Past into selection
Mude o blend mode para Luminance (L)
Baixe a opacidade para 62%
Selection none.
Reserve esta layer.
4.
Abra o tube da mulher "PaulinaDesignWomanHairDress2009"
Copie - Past as new image
Layers - New raster layer
Forme um gradiente com as cores - foreground: #ba8ab4
e background: #381031
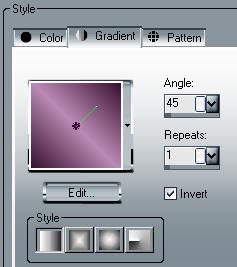
Pinte a layer.
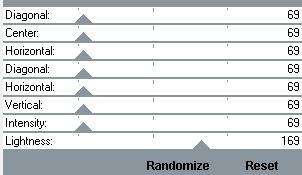
Effects - Filters Unlimited 2.0 - Sandflower Specials -
Pool Shadow
Layers - Arrange - Move
down.
Se posicione na layer de cima
Effects - 3D Effects - Drop Shadow 1 1 100 60,00
#000000.
Layers - Merge - Merge all
Selection - Selection all - Modify - Contract 5
Pinte com o mesmo gradiente, mudando o Repeats para 10.
5. Copie
- Past as new layer na imagem 800x600
Posicione a layer como no exemplo.
Abra o tube da flor "summer_elements "
Copie - Past as new layer
Image - Resize 60%
Mude o blend mode para Luminance (L)
Effects - 3D Effects - Drop Shadow 1 1 100 5,00 #000000
Posicione a direita embaixo da layer da mulher.
Layers - Duplicate
Image - Mirror
Image - Resize 60%
Posicione a esquerda acima da layer da mulher.
6.
Abra o wordart "sieze moment"
Com a ferramenta selection marque a primeira palavra "sieze"
Copie - Past as new selection
Image - Resize 40%
Effects - 3D Effects - Drop Shadow 1 1 50 40,00 #e1a6da
Repita este processo com as outras palavras.
7.
Layers - New raster layer
Selection - Selection all - Modify - Contract 15 -
Invert
Pinte com o gradiente da etapa 4
Selection - Selection all - Modify - Contract 12 -
Invert
Effects - Filters Unlimited 2.0 -
Sandflower Specials - Pool Shadow
Selection - Selection all - Modify - Contract 3 - Invert
Pinte com o gradiente
Selection none.
8. Layers - Merge -
Merge all
Assine seu trabalho.
9. Layers - Duplicate
2x
Feche a 2ª e 3ª layer e posicione na 1ª
Com a ferramenta selection marque as duas flores
Effects - Plugin Alien Slin Xenofex - Bling Bling
Feche esta layer e
ative a 2ª
Repita o efeito mudando o Random Seed para 5.
Feche esta layer e ative a 3ª
Repita o efeito mudando o Random Seed para 10.
Salve um de cada vez como *psp (PSP Animation Shop)
10. Abra o programa
Animation Shop
Animation Wizard e busque as layers salvas
Velocidade 15.
11. Salve e está
pronto.
Meus tutoriais são registrados by
TWI

Home
Design by
Sweet Seduction.
Copyright © 2009 - 2010 by Sweet Seduction.

